创建你的第一个 Webhook URL
创建新的 Webhook
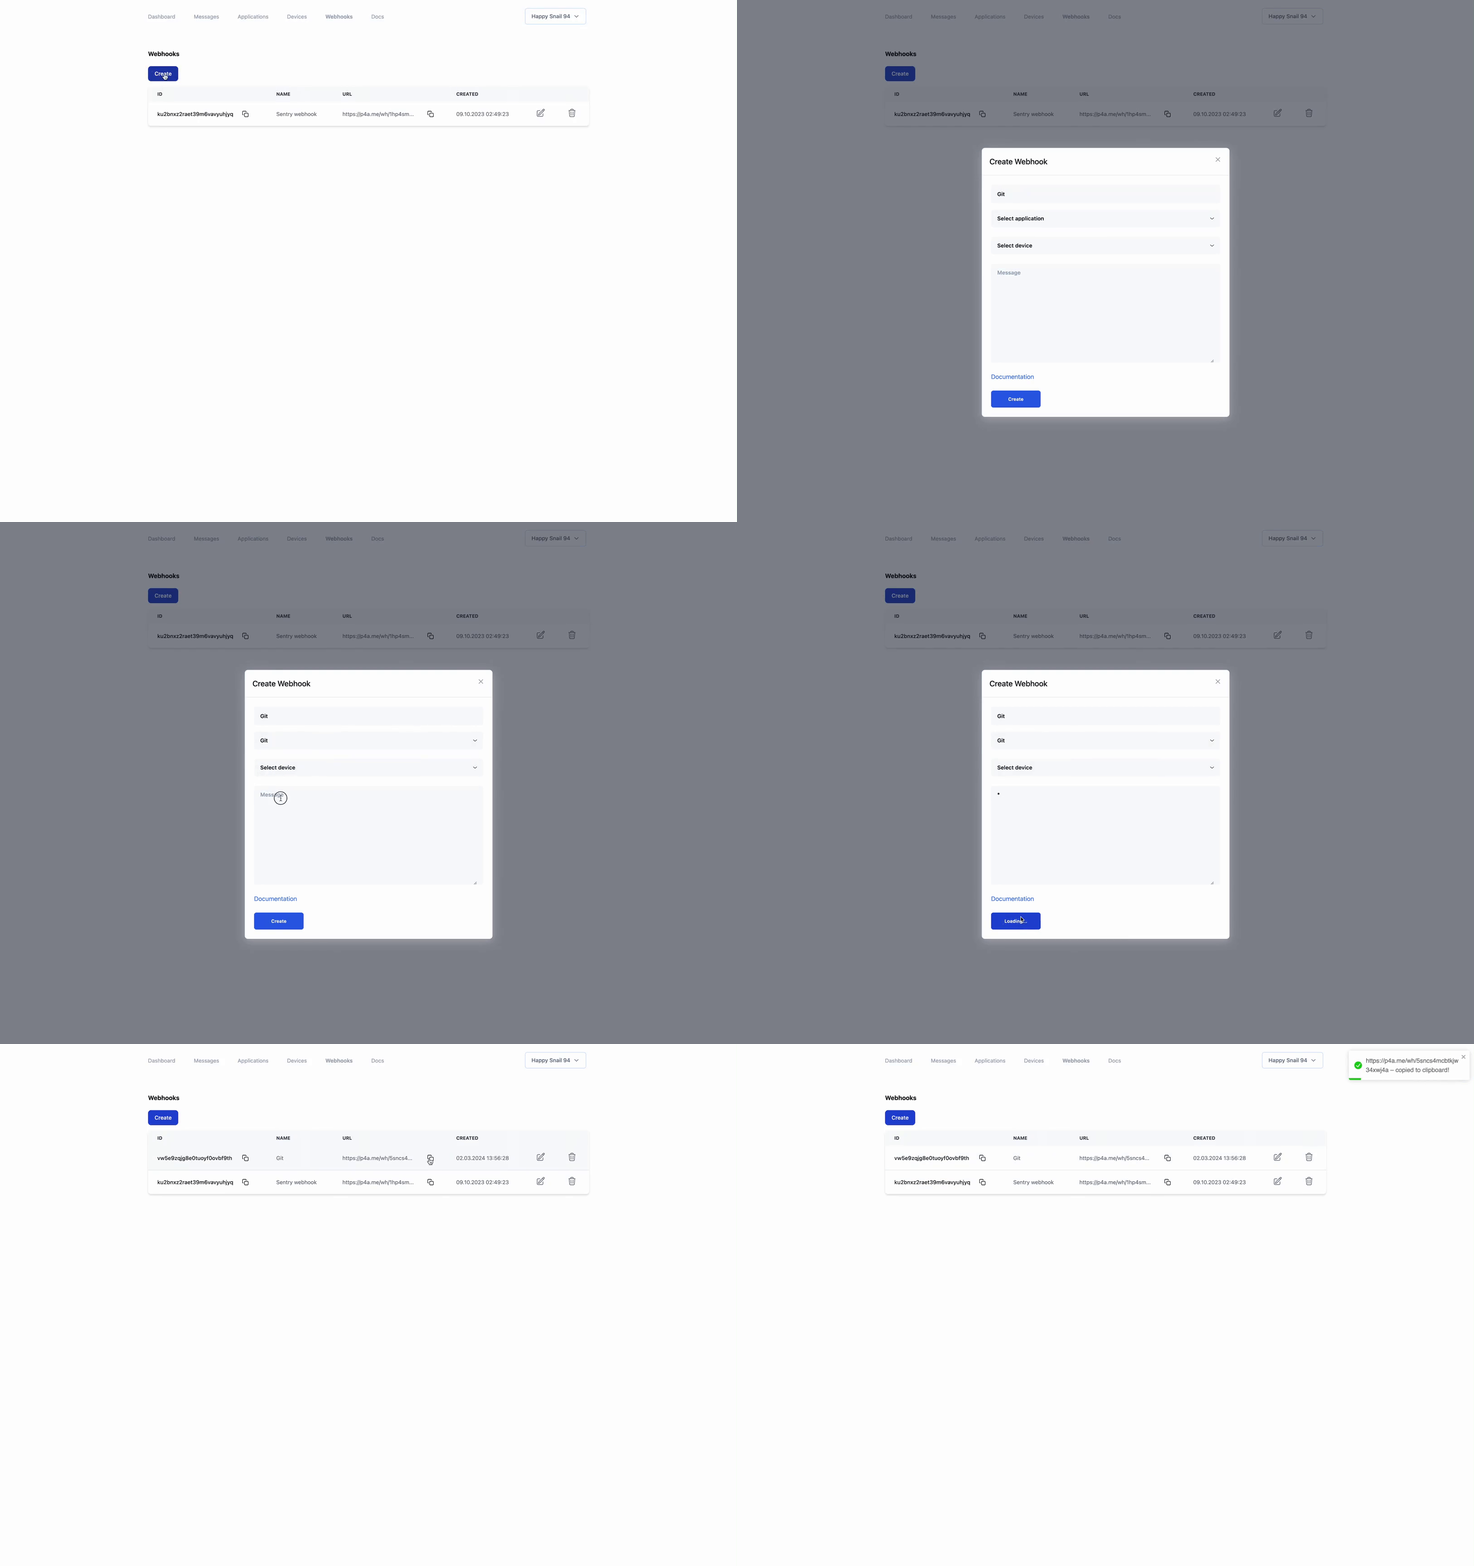
- 前往 Webhooks 页面
- 点击 "Create" 按钮
- 按以下信息填写表单:
- Name:Webhook 的名称
- Application:要关联该 Webhook 的应用
- Device:要关联该 Webhook 的设备
- Message:Webhook 被触发时发送的消息
- 点击 "Create" 按钮
- 复制 Webhook 的 URL
在消息中,我们使用 * 获取全部 JSON,然后确定需要哪些参数。
JSON 解析器的工作原理
Webhook 是应用之间实时传输数据的关键。按照以下步骤高效配置 Webhook,确保与你的系统无缝集成。
- 定义你的 JSON 负载结构
确定你希望接收的数据格式。要获取完整数据集,请在配置中使用通配符 *。这样可以确保整个 JSON 负载被原样发送,不经过过滤。 - 从嵌套 JSON 中提取特定数据
要定位嵌套对象中的单个字段,请使用语法%objectName.field%。例如,%params.name%会从 params 对象中提取 name 的值。
{
  "event": {
    "title": "New Order",
    "message": "A new order has been placed with ID 12345",
    "tags": ["order", "new"],
    "users": [
      {"first": "Dale", "last": "Murphy", "age": 44, "nets": ["ig", "fb", "tw"]},
      {"first": "Roger", "last": "Craig", "age": 68, "nets": ["fb", "tw"]},
      {"first": "Jane", "last": "Murphy", "age": 47, "nets": ["ig", "tw"]}
    ]
  }
}
要设置 Webhook,你可以这样配置:
- 如果想显示完整的 JSON,只需使用 *
- 要获取事件标题,使用
%event.title% - 要获取消息内容,使用
%event.message% - 要获取标签,使用
%event.tags%
Title: %event.title%
Message: %event.message%
Tags: %event.tags%
Users: %event.users.0%
First user: %event.users.0.first% %event.users.0.last%
以下是根据示例 JSON 和上述配置得到的输出示例:
Title: New Order
Message: A new order has been placed with ID 12345
Tags: ["order","new"]
Users: {"age":44,"first":"Dale","last":"Murphy","nets":["ig","fb","tw"]}
First user: Dale Murphy
有关变量的更多信息,请参阅 GJSON Path Syntax。